Do you want to know how to make light switch wiring? Or you just want to replace the old one? There are a number of reasons you might need to replace a switch. The switch might be broken, the light may not come on reliably because the switch is failing or has a loose connection, or you might simply want to change the switch’s color or style. As with receptacles, there are a number of different switch options available.
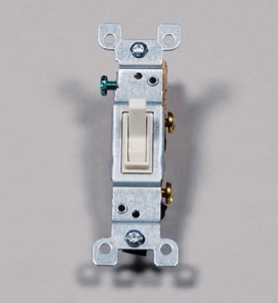
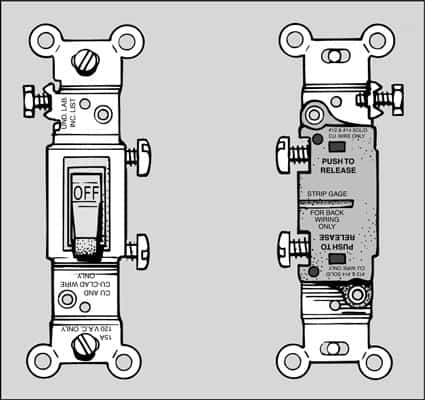
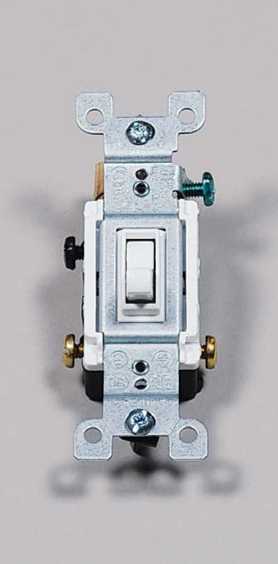
STANDARD TOGGLE. This simple, single-pole switch is the most commonly installed. It is identifiable by its three screw terminals: two brass-colored screws and a green grounding screw.
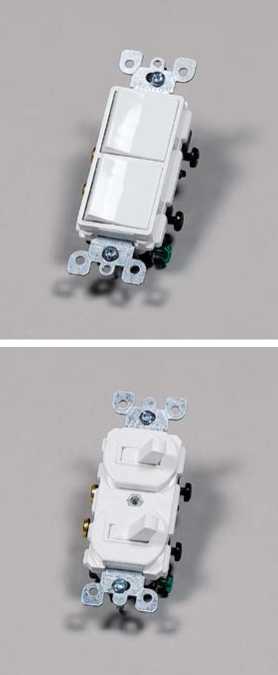
OTHER OPTIONS. A stack switch fits two switches into the space of one. The more modern and sleek decorator-style switch is at top; the standard toggle, at bottom.
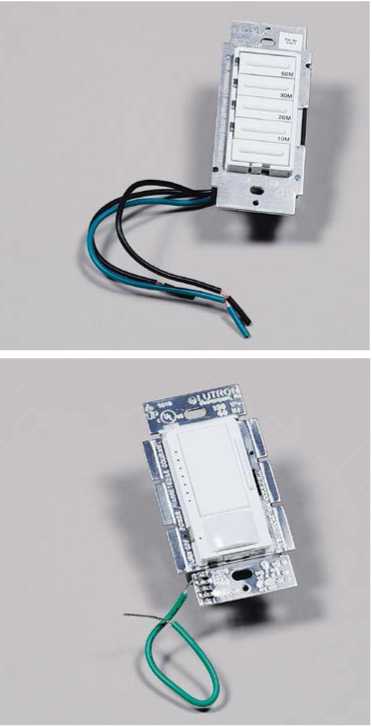
AUTOMATIC SWITCHES SAVE ENERGY. A timer (countdown) switch is used for the bath vent fan, while a vacancy sensor shuts off the power when no motion is detected in a room.
CONTROL A LIGHT FROM MORE THAN ONE LOCATION. Two threeway switches allow switching from two locations (the toggle style is shown above, but the switches are also available in decorator style).
How to Replace Light Switch Wiring
To replace a switch, first cut the power at the breaker and verify that the power is off by observing the light go off when the breaker is shut off. Take off the cover plate, check with a volt-tick to be sure that there is no voltage present, remove the switch mounting screws, and pull the switch out. Test again to be sure the power is off at the switch terminals and in all wires in the box. Sometimes there are two different circuits in a box.
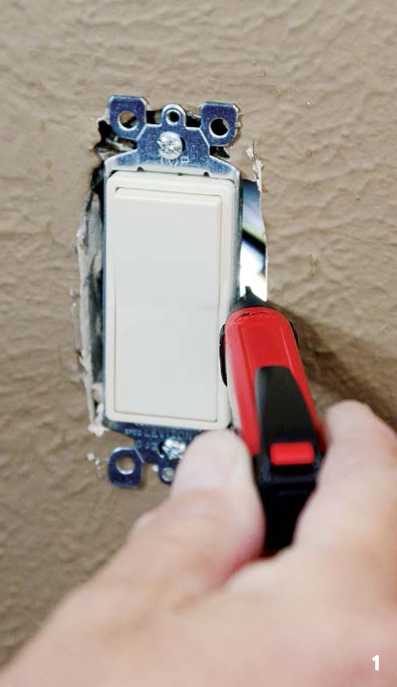
- CHECK FOR VOLTAGE. Before removing the switch, insert the tip of the tester at the sides of the switch; this checks for a loose wire that may still be connected to power. After pulling the switch out, check for voltage again.
Wiring a Single-Pole Switch
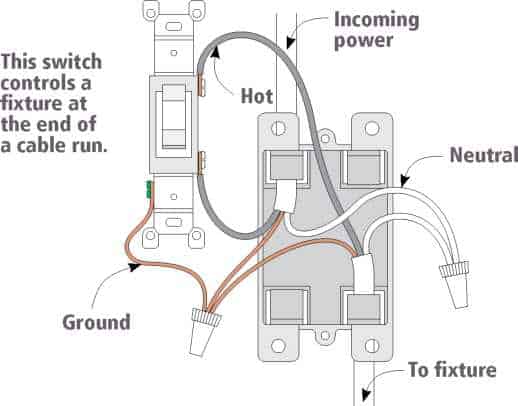
Remove the wires from the existing switch one at a time, and connect them to the appropriate terminal of the new switch. The two black wires go to the brass-colored terminal screws, and the bare copper (or green insulated) ground wire goes to the green ground screw on the switch. Fold the wires into the box as described previously, screw the switch to the box, and install the cover plate. Power up the circuit and test.Look at the light switch wiring unit you are replacing. If it has two brass screws and a green screw, it’s a simple switch, also called a single-pole, single-throw switch (the drawing above shows the wiring configuration for a singlepole switch). If it has one black and two brass screws and a ground, it’s a three-way switch (a single-pole, double-throw switch). If it has four brass screws and a green screw, it’s a four-way switch. For a three-way switch, mark the wire attached to the black screw, using a bit of tape so that you can be sure to connect this wire to the black screw on the new switch. Because of the complexity of four-way switches, I suggest you call an electrician to replace a four-way switch.
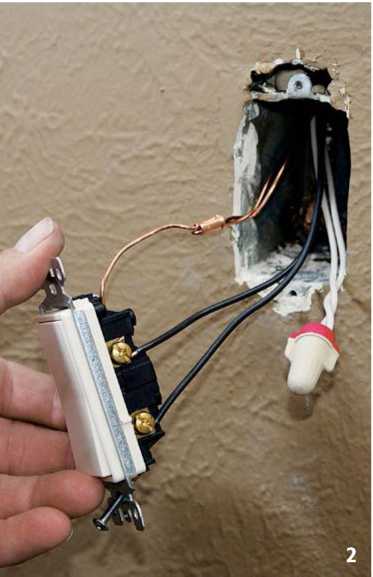
- A SIMPLE Light SWITCH wiring with connections made. The two black wires go to the brass terminals, and the bare copper wire is connected to the ground screw.
QUICK TIP
Simple light switch wiring have a mark to indicate which end of the switch is the top, or “up,” so that when the handle is down, the switch is off. Make sure to install the switch in the correct orientation. Threeway and four-way switches don’t have a top, so they can be installed in any orientation.
QUICK TIP
If the wires from the old switch are too short to install the new switch (or outlet), add a length of wire. Use a twist-on wire connector to make a splice.
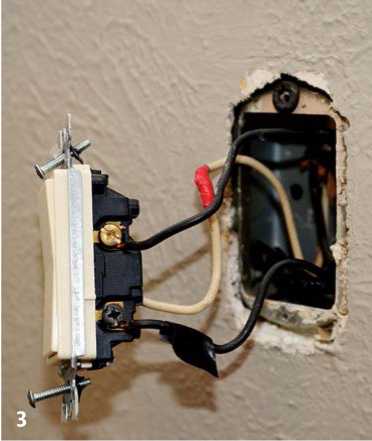
- THREE-WAY SWITCH WIRED IN.
As marked before from the original switch, one wire (either power in, or the wire to the light fixture) goes to the black terminal, two wires go to the brass screws, and the bare copper wire (not visible here) goes to the ground screw.