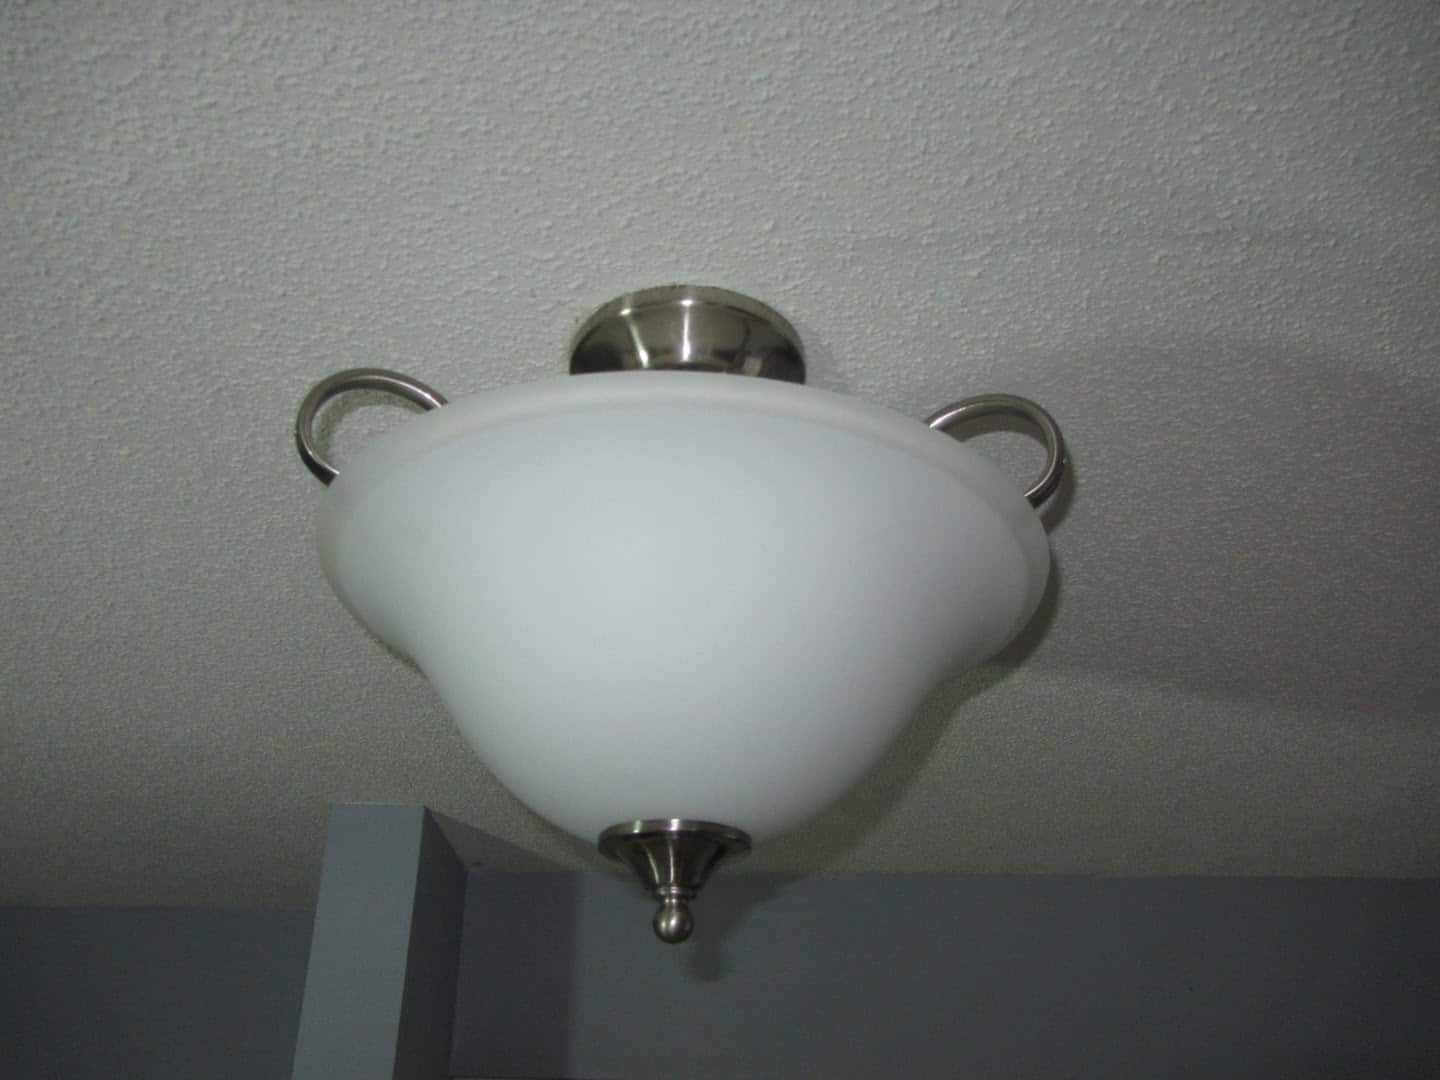
Basic options for light fixtures include ceiling fixtures and wall fixtures (or sconces). A fixture may have a screw base for a standard incandescent light-bulb socket or a pin base for a compact fluorescent bulb.
To replace a fixture, shut off the power and verify by testing that it’s off. Remove the old fixture. Take the shade off, then take the bulbs out. There are usually two screws that hold the fixture base onto a mounting bracket. There will be three wires from the fixture to the building wiring in the ceiling (or wall): a black, a white, and a bare ground, each spliced to the small fixture wires of the corresponding color.
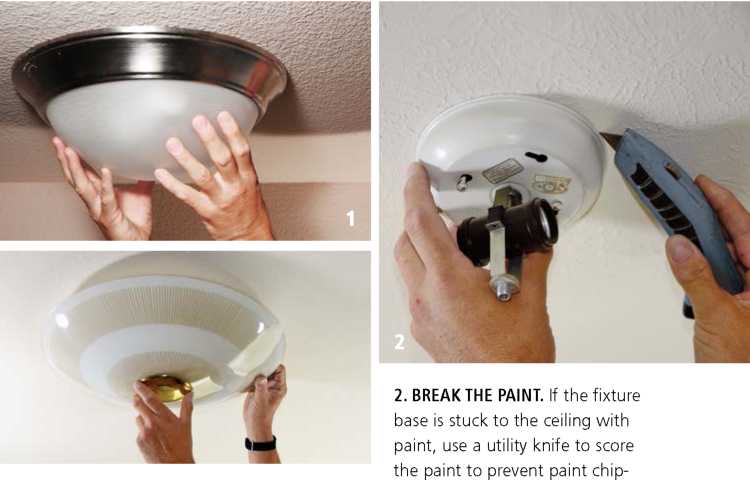
1. REMOVE THE SHADE. For some ping around the fixture fixtures, the glass shade rotates to release; for others, there’s a decorative nut on the bottom of the shade.
Test for voltage on each wire. Cut the fixture wires on the fixture side of the splice, then check the wires in the electrical box for voltage. Remove the old mounting plate.
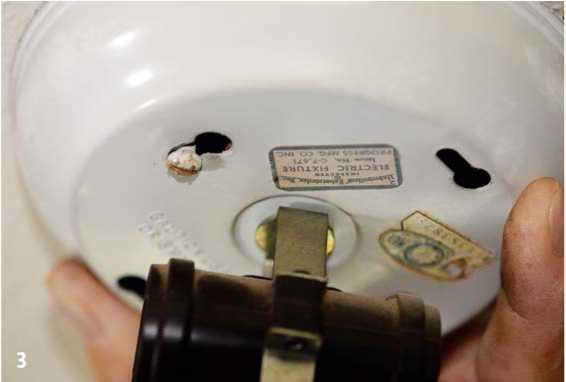
3. LOOSEN THE MOUNTING SCREWS. Some fixtures have keyhole-shaped holes for mounting. Loosen the screws slightly and rotate the fixture to dismount it.
QUICK TIP
When removing a fixture, often the screws can be loosened and the fixture rotated a bit so that the screw heads will clear wider openings in the mounting holes. This is much easier than completely removing the two screws.
4. CHECK EACH WIRE FOR VOLTAGE.
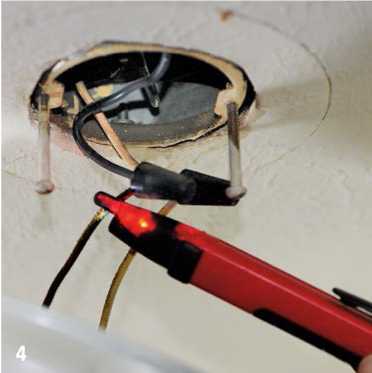
Use a volt-tick to verify that the circuit is off and safe to work on. Here, the glowing red light indicates that the circuit is still on.
Installing Light Fixture

INSTALL THE NEW MOUNTING BRACKET.
If there are two screws used to mount the fixture base to the mounting plate, screw them into the mounting plate before you attach the fixture base to the ceiling box (if there are keyhole mounting slots).
5. HOOK AND HOLD.
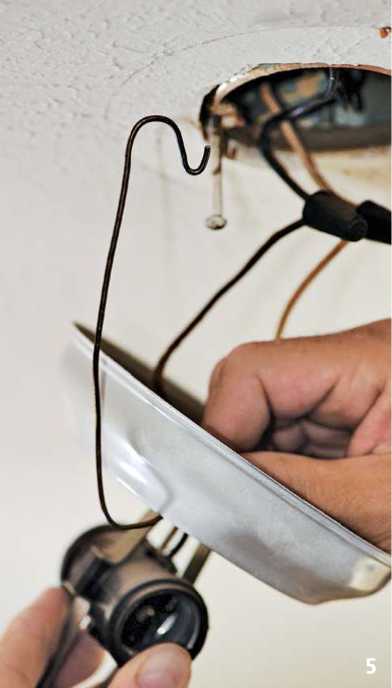
Don’t let a fixture hang on any of the electrical wiring, as this could damage the wiring. Instead, use a hook made of heavy coat-hanger wire to hold the fixture while you make the splices; attach the top end of the hook to the mounting bracket.
If you want to replace a light fixture with a ceiling fan, make sure the electrical box is strong enough to handle the weight and the motion of the fan. This usually means replacing the existing ceiling box with one that is “ceil- ing-fan rated.”
Tuck the splices and wires back into the electrical box, and finish by installing the fixture base, then the bulbs, then the shade. Power up the circuit and test. If the lights don’t go on, turn off the power at the switch, and remove and replace the bulb(s). Sometimes new sockets are stiff and the bulb doesn’t seat all the way. If that doesn’t do it, replace the bulbs; sometimes there’s a bad bulb or two in with the fixture. If that doesn’t do it, cut power to the circuit, and check the splices. That’ll usually get things working.
Splicing Small Wires to Bigger Wires
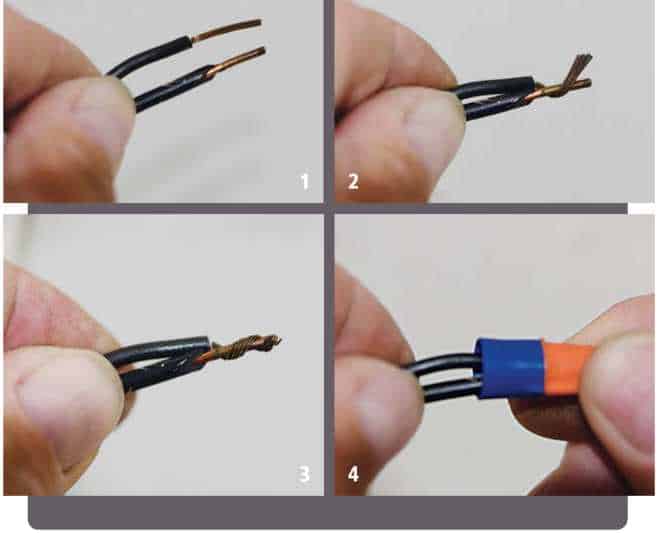
The trick to connecting a small, stranded fixture wire to a larger, solid building wire is to twist the stranded wire around the solid wire and leave a bit of the stranded wire past the solid wire. This way, the wire connector will grab the stranded wire first. After you’ve twisted on the connector, give the stranded wire a gentle tug to make sure it’s been grabbed by the connector.