Bathroom Installation
Follow these steps to modernize your bathtub and shower.
You may have a bathtub that isn’t enclosed by three walls; your tub may be lacking a shower; or you may simply want to replace a badly damaged bathtub. Whatever your needs, you can modernize your bathroom by installing a built-in bathtub/shower enclosure, using the existing plumbing as a starting point.
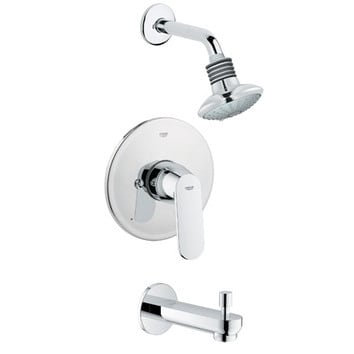
If your current bathtub isn’t enclosed and you don’t want to replace your tub with a free-standing, cast-iron bathtub, you’ll need to build a new wall at the head of the tub. Build a 2 x 4 stud wall the width of the bathtub you plan to install. Notch all the framing members to allow for the pipes. If you’re installing a shower where there wasn’t one before, you’ll need to extend the pipes to create a single water supply pipe to the shower head. And, in some cases, you may even need to extend the water supply pipes to the faucets. The water supply pipes should be attached about 50 to 7 5cm (20 to 30in) above the floor, with the tub spout centered about 50cm (20m) above the floor. Shower pipes extend 1.5 to 1.8m (5 to 6ft) above the floor and are centered on the width of the tub.
When building a new enclosure wall, you’ll need to install a 2 x 4 brace at the tops of the water supply pipe and the shower pipe to support the faucets and shower outlet. A third brace should be installed between the first two to support the long shower pipe
To remove your old tub, you’ll need access to the drain- and overflow pipes. If your tub is freestanding, the job is easy. Shut off the water supply, remove the faucets and disconnect the drain line and overflow pipe. If your bathtub is enclosed, there may be an access panel behind the wall at the head of the tub, which will enable you to make the necessary disconnections. If there’s no access panel, you may be able to disconnect the tub from the front. If you plan to install a new shower head where there isn’t any existing pipework, you’ll need to remove the wallboard anyway, so you may as well remove it now to help you make your tub disconnections
Once the drain and overflow pipes have been disconnected, you can pull the tub from its 1 x 4 supports. These supports line the three walls and the tub flanges rest on them. You may have to unscrew the tub flanges After the tub is removed, handle any necessary plumbing work.
To install the new tub, lower the tub onto the 1 x 4 support beams. With luck, the tub will rest on the beams and also sit solidly on the floor. If it doesn’t, adjust the wall supports until the bathtub is level and the drain and overflow holes are lined up with the pipes. Most plumbing codes prohibit shimming of the tub. Some manufacturers also recommend sloping the tub toward the drain. With the tub lined up, screw the tub flanges in place.
Connect the drain and overflow pipes, cover your new wall with waterproof wall board and matching tiles. Cauik around the tub to prevent water seepage, then turn on the water supply.
Bathtubs are made from steel, cast iron, porcelain or fiberglass, with fiberglass being the most popular in today’s homes. Many homeowners, when replacing bathtubs, are installing whirlpool tubs that have jetted water sprays. This type of tub is usually made of molded acrylic. When installing this type of tub, check the manufacturer’s directions for plumbing, because jet sprays around the tub require additional plumbing work.
Cast-iron tubs have a historical look that some people desire in their bathrooms. When installing this type of tub, remember that it weighs about 225kg (500lb) and may demand bracing of the joists if the tub is to be installed on the main floor, and may be an impossible installation on a second floor because of its weight